Savory Pressure-Canned Venison
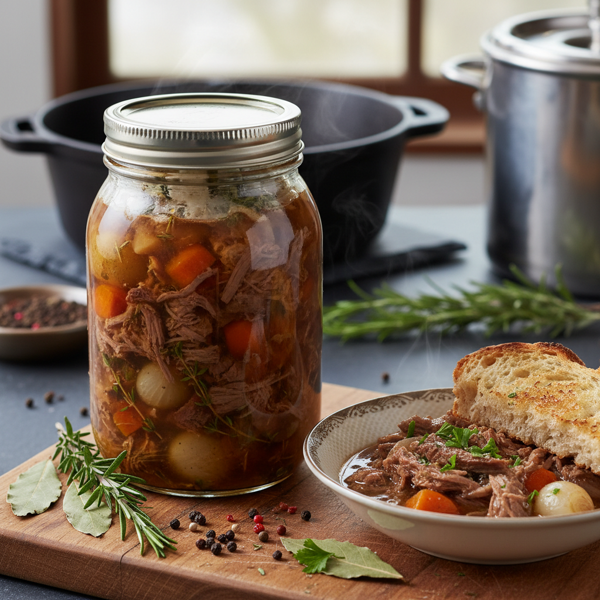
This Savory Pressure-Canned Venison recipe ensures you can enjoy tender, flavorful venison anytime you need a quick meal. Perfect for busy evenings or camping trips, each jar is packed with lovingly prepared venison, ready to heat and eat. With its rich gravy created from the natural juices of the meat, this dish offers warmth and comfort, making every bite a reminder of hearty home-cooked goodness. Plus, the canning process allows for long-term storage, so you can preserve that fresh venison goodness well into the future. This cherished family recipe is a must-have staple for any pantry and is perfect for sharing with friends and family.
3
Servings
800
Calories
3
Ingredients
Ingredients
venison roast
3 lbs (cut into 1-inch cubes)
salt
1 tsp per pint; 2 tsp per quart (none)
clean jars
2-3 (for canning, with lids (Pint or quart))
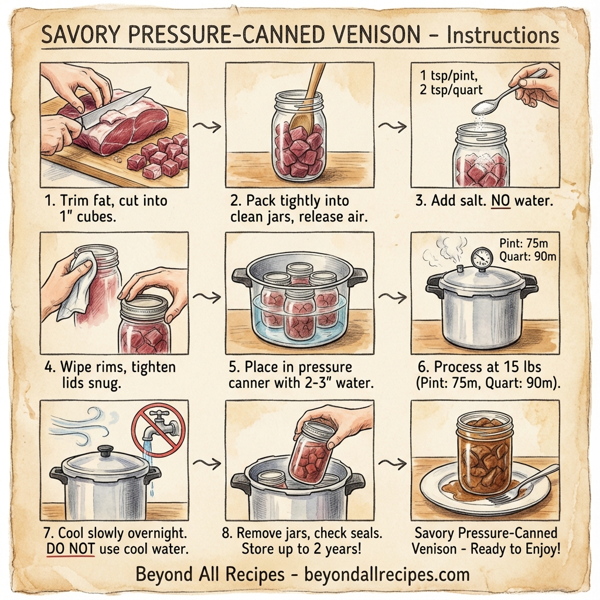
Instructions
1
Begin by trimming all excess fat from the venison roast to ensure a lean and delicious final product.
2
Cut the venison into 1-inch cubes, aiming for uniform pieces to promote even cooking.
3
Carefully pack the cubed venison tightly into clean canning jars, using a knife handle or the handle of a wooden spoon to release any trapped air pockets.
4
For each pint jar, add 1 teaspoon of salt; for each quart jar, add 2 teaspoons of salt. This will enhance the flavor of the meat as it processes.
5
Do not add any additional water; the venison will create its own natural juice during the canning process.
6
Wipe the rims of the jars with a clean cloth to ensure a proper seal, then place the jar lids and rings on top. Tighten them until they are snug but not overly tight.
7
Place the jars in the pressure canner, ensuring that you have added 2 to 3 inches of water to the canner before sealing it.
8
Process the jars at 15 pounds of pressure: 75 minutes for pint jars and 90 minutes for quart jars.
9
Once processing is complete, remove the canner from heat and allow it to cool slowly in a draft-free area with the weight still attached.
10
Avoid placing the canner under cool water to expedite cooling; instead, let it sit overnight.
11
The next day, carefully remove the jars from the canner. If there is any broth or oil on the outside of the jars, wash them with soap and water for cleanliness.
12
In the event that a jar does not seal properly, transfer its contents to a zip-lock freezer bag, label it, and freeze it for later use. Do not attempt to re-process unsealed jars.
13
When stored correctly, the canned venison can be kept for up to 2 years, giving you a convenient, delicious meal ready to go!
Nutrition Information
30g
Fat
0g
Carbs
100g
Protein
0g
Fiber
0g
Sugar
Frequently Asked Questions
Frequently Asked Questions
What is the main purpose of this pressure-canned venison recipe?
This recipe is designed to preserve lean venison roast into tender, flavorful cubes that are shelf-stable and ready to heat and eat for quick meals or camping trips.
What cut of meat is best for this recipe?
The recipe calls for a venison roast, which should be trimmed of all fat before being cubed.
How should the venison be prepared before canning?
Begin by trimming all excess fat from the roast and then cut the meat into uniform 1-inch cubes for even cooking.
Why is it important to trim the fat from the venison?
Trimming the fat ensures the final canned product is lean and has a delicious flavor, as venison fat can sometimes have a strong, waxy taste.
How do I pack the meat into the jars?
Pack the cubed venison tightly into clean canning jars, leaving as little empty space as possible while following headspace guidelines.
How do I remove air pockets from the jars?
Use a knife handle or the handle of a wooden spoon to press down and release any trapped air pockets between the meat cubes.
How much salt should be added to pint jars?
Add 1 teaspoon of salt to each pint jar before sealing.
How much salt should be added to quart jars?
Add 2 teaspoons of salt to each quart jar before sealing.
Should I add water or broth to the jars?
No, do not add any additional water; the venison will create its own natural juice and rich gravy during the canning process.
What should I do to the jar rims before sealing?
Wipe the rims with a clean cloth to remove any residue, ensuring a proper seal with the lids.
How tight should the jar rings be?
Tighten the jar rings until they are snug, but be careful not to make them overly tight.
How much water should be in the pressure canner?
Ensure there are 2 to 3 inches of water in the canner before you begin the sealing and heating process.
What is the required pressure for canning this venison?
The jars should be processed at 15 pounds of pressure.
How long do pint jars need to process?
Pint jars must be processed for 75 minutes at 15 pounds of pressure.
How long do quart jars need to process?
Quart jars must be processed for 90 minutes at 15 pounds of pressure.
How should the canner be cooled?
Remove the canner from the heat and allow it to cool slowly in a draft-free area with the pressure weight still attached.
Can I use cool water to speed up the cooling process?
No, you should never place the canner under cool water to speed up cooling; let it sit naturally instead.
How long should the jars sit before being handled?
The jars should sit in the canner overnight to ensure they have cooled completely and sealed properly.
What should I do if the outside of the jars are oily the next day?
If there is broth or oil residue on the outside, wash the jars with soap and water to keep them clean for storage.
What if a jar does not seal correctly?
Transfer the contents to a zip-lock freezer bag, label it, and freeze it for later use.
Can I re-process a jar that failed to seal?
No, do not attempt to re-process jars that did not seal during the initial canning cycle.
How long can canned venison be stored?
When stored correctly in a cool, dark place, the canned venison can be kept for up to 2 years.
What are the nutritional values for this recipe?
Each serving contains approximately 800 calories, 30g of fat, 100g of protein, and 0g of carbohydrates.
Is there any sugar in this recipe?
No, this recipe contains 0g of sugar.
How many servings does this recipe provide?
The recipe is calculated to provide approximately 3 servings based on 3 lbs of meat.
Is this recipe suitable for camping trips?
Yes, it is perfect for camping because it is fully cooked and ready to eat once heated.
What is the primary flavor profile of this dish?
It features a savory, hearty flavor with a rich gravy created from natural meat juices.
What size cubes are recommended for the meat?
The meat should be cut into 1-inch cubes.
Is additional seasoning required besides salt?
The basic recipe uses only salt to enhance the natural flavor of the meat, though users often add their own seasonings when heating to serve.
Is this a family recipe?
Yes, this is described as a cherished family recipe and a staple for any pantry.