Coconut Delight No-Sugar Candies
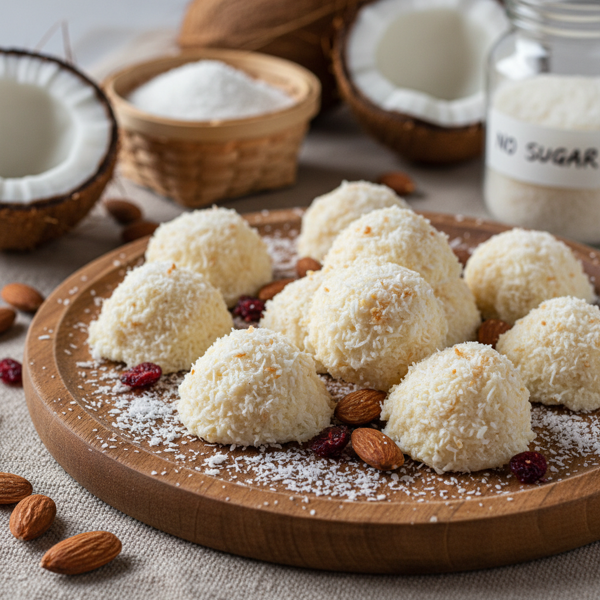
Indulge in these delectable Coconut Delight No-Sugar Candies that are perfect for anyone seeking a delicious treat without the guilt. Made with the natural sweetness of organic coconut and virgin coconut oil, these candies are enhanced with a blend of xylitol and stevia. Each piece is enrobed in homemade sugar-free dark chocolate, delivering a smooth, decadent coating. These candies are simple to make with just a handful of ingredients and offer a satisfying texture and taste guaranteed to delight your senses.
15
Servings
N/A
Calories
6
Ingredients
Ingredients
shredded coconut
1 cup
coconut oil
3 tablespoons (melted)
sea salt
1 pinch
Xylitol sweetener
1/3 cup
pure stevia powder
1/4 teaspoon ((or 1 teaspoon liquid stevia))
sugar-free dark chocolate
to coat (melted)
Instructions
1
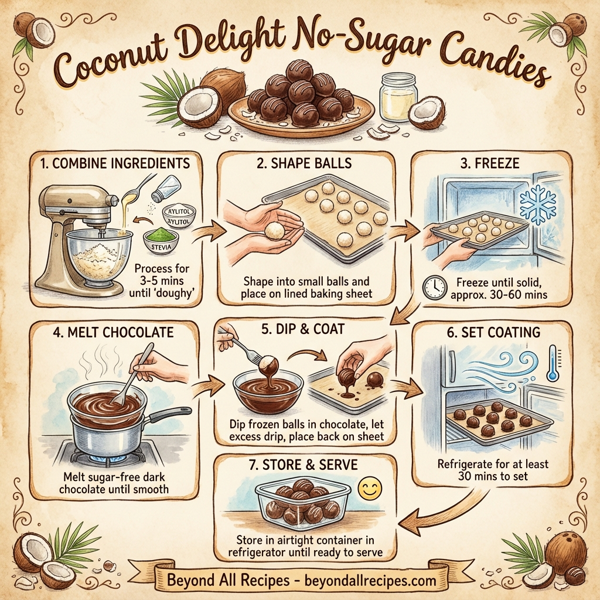
In a stand mixer, combine the shredded coconut, melted coconut oil, sea salt, xylitol sweetener, and stevia. Process the mixture for about 3-5 minutes, or until it forms a 'doughy' consistency.
2
Using a small scoop or your hands, shape the mixture into small balls and place them on a baking sheet lined with parchment paper.
3
Transfer the baking sheet to the freezer and allow the coconut balls to freeze until they are completely solid, approximately 30-60 minutes.
4
Melt the sugar-free dark chocolate in a double boiler or microwave, stirring until smooth.
5
Dip the frozen coconut balls into the melted chocolate, ensuring they are evenly coated. Let any excess chocolate drip off before placing them back onto the lined baking sheet.
6
Allow the chocolate coating to set by placing the candies in the refrigerator for at least 30 minutes.
7
Store the Coconut Delight No-Sugar Candies in an airtight container in the refrigerator until ready to serve.
Nutrition Information
Frequently Asked Questions
Frequently Asked Questions
What are Coconut Delight No-Sugar Candies?
They are a delicious, guilt-free treat made with shredded coconut, coconut oil, and sugar-free dark chocolate, sweetened with a blend of xylitol and stevia.
Is this recipe keto-friendly?
Yes, these candies are keto-friendly as they use sugar-free sweeteners and low-carb ingredients like coconut and dark chocolate.
How many servings does this recipe provide?
This recipe makes approximately 15 servings.
What sweeteners are used in the coconut centers?
The filling is sweetened with a combination of 1/3 cup of Xylitol and 1/4 teaspoon of pure stevia powder.
Can I use liquid stevia instead of stevia powder?
Yes, you can substitute 1 teaspoon of liquid stevia for the 1/4 teaspoon of pure stevia powder.
What kind of chocolate is used for the coating?
The candies are coated in sugar-free dark chocolate, which can be melted in a double boiler or microwave.
How long does it take to process the coconut mixture?
In a stand mixer, you should process the shredded coconut, oil, salt, and sweeteners for about 3-5 minutes until it reaches a doughy consistency.
Do I need to freeze the coconut balls before coating them?
Yes, you should freeze the coconut balls for 30-60 minutes until they are completely solid before dipping them in chocolate.
How should I store these candies?
Store the Coconut Delight No-Sugar Candies in an airtight container in the refrigerator.
Are these candies gluten-free?
Yes, according to the tags, this recipe is gluten-free.
What is the primary fat source in this recipe?
The primary fat source is coconut oil, specifically 3 tablespoons of melted coconut oil.
How do I ensure the chocolate coating sets properly?
Place the chocolate-coated candies in the refrigerator for at least 30 minutes to allow the coating to set.
What consistency should the coconut mixture have?
The mixture should be processed until it forms a 'doughy' consistency that can be shaped into balls.
Should the baking sheet be lined?
Yes, use a baking sheet lined with parchment paper to prevent the candies from sticking.
How do I shape the coconut mixture into balls?
You can use a small scoop or your hands to shape the doughy mixture into small balls.
Can I use a microwave to melt the chocolate?
Yes, you can melt the sugar-free dark chocolate in either a double boiler or a microwave, stirring until smooth.
Is salt required in this recipe?
Yes, a pinch of sea salt is included in the coconut mixture.
How many ingredients are in this recipe?
There are 6 ingredients: shredded coconut, coconut oil, sea salt, xylitol, stevia, and sugar-free dark chocolate.
Are these candies suitable for a low-carb diet?
Yes, they are specifically tagged as a low-carb treat.
Do I need to wait after coating them with chocolate?
Yes, let any excess chocolate drip off and then refrigerate them for 30 minutes before serving.
What type of coconut should I use?
The recipe calls for 1 cup of shredded coconut.
Is the coconut oil used solid or liquid?
The coconut oil should be melted before being added to the stand mixer.
What is the texture of these candies?
They offer a smooth, decadent chocolate coating with a satisfying coconut center.
Are these candies sugar-free?
Yes, they are made with no sugar, utilizing xylitol and stevia for sweetness and sugar-free dark chocolate.
How long do I freeze the balls for?
Freeze the coconut balls for approximately 30 to 60 minutes.
Can I serve these immediately after dipping?
It is best to refrigerate them for at least 30 minutes first so the chocolate coating can set.
What tool is best for mixing the coconut filling?
A stand mixer is recommended for combining the coconut ingredients until they reach a doughy texture.
Are these candies considered a healthy dessert?
Yes, they are tagged as a 'healthy treat' due to their sugar-free and keto-friendly ingredients.
Can I store these at room temperature?
The instructions recommend storing them in the refrigerator until ready to serve to maintain their texture.
What is the final step in the recipe?
The final step is to store the candies in an airtight container in the refrigerator until you are ready to serve them.